The trend of building DIY outdoor saunas has grown significantly, as more people seek ways to enhance their home relaxation experiences. Outdoor saunas not only offer a private retreat for relaxation and detoxification but also add a luxurious touch to your backyard or garden space. This guide is dedicated to helping you embark on the journey of building a DIY outdoor sauna that your family and friends can enjoy.
Key Takeaways
- A DIY outdoor sauna not only provides a space for relaxation and rejuvenation but also offers significant health benefits.
- Building your own sauna allows for complete customization, ensuring it perfectly fits your space and needs.
- While the initial investment may seem substantial, the added value to your property and the long-term health benefits make it a worthwhile project.
- There are three primary approaches you can take: building a sauna from scratch, converting an existing structure, or opting for a DIY sauna kit.
Why Build a DIY Outdoor Sauna?

Health Benefits
Regular sauna use comes with a plethora of health benefits. From improved blood circulation and reduced risk of cardiovascular diseases to aiding in stress relief and muscle relaxation, the advantages are vast. Additionally, the heat from a sauna can help detoxify the body, releasing toxins through sweat.
Aesthetic and Value Addition
A well-constructed sauna can significantly enhance the aesthetic appeal of your backyard, transforming it into a lush oasis. Furthermore, adding a sauna to your property can increase its value, making it an investment worth considering.
How to Build Your DIY Outdoor Sauna

For those looking to create a unique outdoor sauna experience, there are three primary approaches you can take: building from scratch, converting an existing structure, or opting for a DIY sauna kit. Each method offers its unique set of benefits and challenges, tailored to different skill levels, and budgets.
Read More: How Much Does it Cost to Build Your Own Sauna?
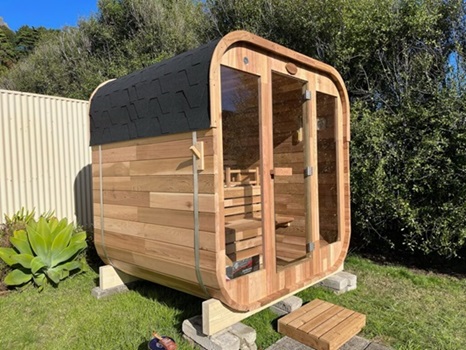
DIY Sauna Kits
For those seeking a balance between customization and convenience, DIY sauna kits offer a prefabricated solution that simplifies the construction process.
Pros:
- Easier and faster to assemble than building from scratch.
- Kits come with pre-cut materials and instructions, reducing the chance of errors.
- Allows for some level of customization while providing the basics.
Cons:
- Less flexibility in design and size compared to building from scratch.
- Quality and materials can vary between kits, so research is essential.
- The cost may be higher than converting an existing building but typically lower than building from scratch.
Pre-built sauna kits are an excellent option for those looking for a simpler DIY project without sacrificing customization options.
Read More: Assemble Your Own Square Barrel Sauna with Firewood Heater
1. Choose Your Kit
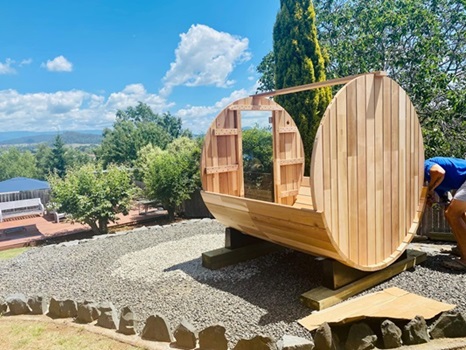
Select a Model: Research and select a pre-built sauna kit that fits your space and personal preferences. Barrel saunas and modular indoor kits are popular choices.
Kit Contents: Ensure your kit includes everything needed for assembly, such as pre-cut wood panels, benches, a heater, and a door.
Considering a barrel sauna? How to Choose Your Barrel Sauna
2. Prepare the Site
Foundation: Even with a pre-built kit, you’ll need a level foundation. Depending on the manufacturer’s recommendations, you can prepare a gravel bed or a concrete slab.
Utility Connections: Plan how you will connect the sauna heater to power (electricity or wood for a stove) and whether you need water access for steam.
3. Assembly
Follow Instructions: Assemble your sauna according to the manufacturer’s instructions. This typically involves constructing the frame, attaching the panels, and installing the door and windows.
Install the Heater: Place the heater in the designated spot, ensuring it meets all safety clearances specified in the instructions.
4. Final Touches
Bench Installation: Assemble and install the benches as according to the manual.
Test: Before using your sauna, test the heater and check the structure for any leaks or drafts that may need sealing.
DIY Build Your Sauna from Scratch

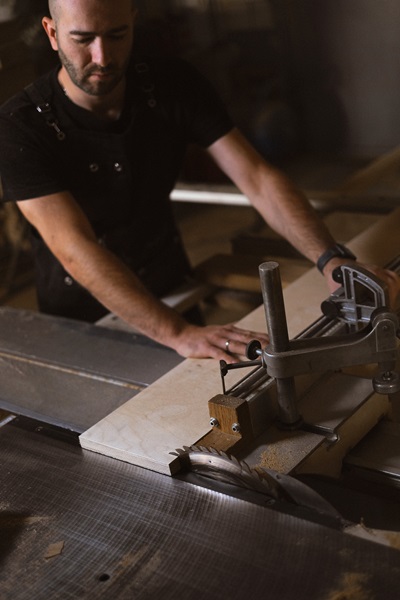
Building a sauna from scratch is the most customizable option, allowing for a personalized design that fits perfectly within your outdoor space.
Pros:
- Complete control over design, size, and materials.
- Ability to tailor the sauna to specific needs and preferences.
- A sense of accomplishment from building something from the ground up.
Cons:
- Requires a higher level of construction skills and knowledge.
- Potentially higher costs due to purchasing raw materials.
- Time-consuming, as it involves planning, sourcing materials, and the actual build.
1. Design and Planning
- Sketch a Blueprint: Begin by sketching a detailed blueprint of your sauna, including dimensions, location of the heater, benches, windows, and door. Consider the direction of the wood grain and ventilation needs.
- Choose Your Location: Select a suitable spot in your backyard that can accommodate the sauna size while considering privacy and proximity to your house for convenience.
2. Foundation
- Prepare the Site: Clear the area of debris and level the ground. For a sauna, a simple gravel base may suffice, but more permanent structures will require concrete footings or a slab foundation.
- Materials: Gather materials such as concrete cubes, bricks, insulation panels, wood boards, sauna heater, and rocks.
3. Framing and Insulation
- Construct the Frame: Use weather-resistant wood to frame your sauna. Cedar, hemlock, or spruce are excellent choices due to their resistance to rot and mildew.
- Insulate: Install insulation panels between the framing and seal them with a vapor barrier to retain heat effectively.
4. Interior and Exterior Finishing
- Wall and Ceiling Paneling: Line the interior walls and ceiling with your chosen wood. Cedar is popular for its aromatic properties and resistance to moisture.
- Install the Heater: Whether wood-burning or electric, ensure your sauna heater is properly installed and meets all safety standards.
- Finishing Touches: Install the benches, door, and any additional features like lighting or a sound system.
Converting/ Repurposing Old Building into Sauna

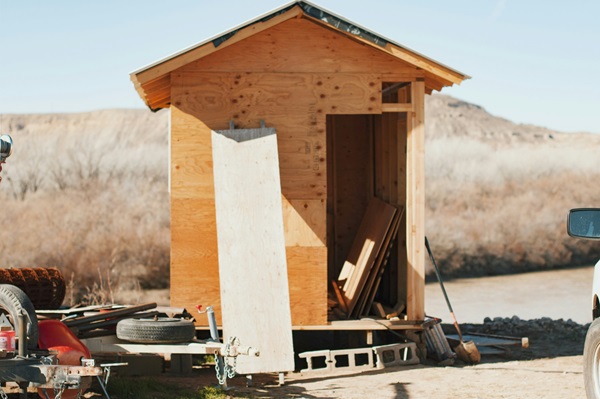
Converting an existing building into a sauna is a cost-effective way to leverage structures that are no longer in use, such as sheds or garages.
Pros:
- Reduces the need to build from scratch, potentially saving time and money.
- Recycles and repurposes existing structures, which is environmentally friendly.
- May already have a foundation and some usable materials.
Cons:
- Limited by the existing structure’s size, shape, and location.
- May require significant modifications to make the structure suitable for sauna use.
- Potential hidden costs in upgrades or repairs to the existing building.
Converting an existing structure into a sauna is a cost-effective way to add this luxurious feature to your home without starting from scratch.
1. Assess the Structure
Select a Building: An old shed, garage, or even a large enough greenhouse can be converted into a sauna. Ensure the structure is sound and can be sealed properly.
Plan for Modifications: Determine what changes are needed, including insulation, ventilation, and installing a heater.
2. Insulate and Seal
Insulate Walls and Ceiling: Use high-quality insulation suited for high temperatures and cover it with a vapor barrier to prevent moisture damage.
Seal Cracks: Make sure the building is airtight to retain heat, sealing any cracks or gaps in the structure.
3. Interior Modifications
Install Sauna Paneling: Line the interior with suitable wood, typically cedar, for its aromatic qualities and moisture resistance.
Sauna Bench: Construct benches from the same wood. Ensure they are sturdy and can withstand the sauna’s high temperatures.
Heater Installation: Choose a sauna stove that fits the size of your converted space and install it according to the manufacturer’s instructions.
General Sauna Key Pointers
1. Planning and Design
Choosing the Right Location
Your sauna should be conveniently located close to your house while ensuring privacy and a beautiful view, if possible. Consider proximity to a power source if you plan on using an electric heater. This can be your backyard, or a shaded area near your house. It’s best to keep it away from streets and the neighbor’s house, not only for privacy, but also to avoid complaints.
Sauna Size and Layout
For a 2-person sauna, a compact size is sufficient, but ensure it’s roomy enough for comfort. For saunas for more people, choose designs that have more seats, i.e. saunas with 2 level benches. Feel free to choose a design based on your personal preference, whether it’s a traditional cabin or a barrel sauna, since the outdoors are more flexible space-wise.
2. Foundation
A solid foundation is crucial for your sauna’s longevity. Depending on your preference and the ground condition, you might choose a concrete slab, pier foundations, or even a gravel and timber frame base. Ensure its level and stability to support the sauna’s weight.
3. Framing and Insulation
Once your foundation is set, the next step is to frame your sauna. Use quality, durable wood like cedar or hemlock, known for their resistance to moisture and decay.
Insulation, on the other hand, is key to keeping the heat in, so don’t skimp on this step. Use foil-backed insulation for the walls and ceiling to reflect heat back into the sauna space. However, for barrel saunas and other sauna kits, the thick wood staves are enough to keep the sauna insulated. Check with your supplier for their recommendations.
4. Heating
You can choose between a wood-burning stove and an electric heater. Each has its benefits, with wood-burning offering a more traditional experience and electric heaters providing convenience and control.
Infrared saunas for outdoors aren’t too common as infrared heaters are typically designed for the indoors. Check your warranty for infrared heaters if they are allowed to be stored outdoors.
5. Finishing Touches
Interior
Line the interior with wood panels, ensuring they are securely fastened. Install benches made from the same wood as the interior paneling. Having benches at different heights offer various heat experiences.
Door and Windows
Install a door with a window to allow for some natural light, and consider one or two small windows to enjoy the view outside while you relax. Glass doors are a good option too, so you can enjoy the outdoor views without the need of extra windows.
Ventilation
Proper ventilation is crucial to ensure air circulation and to control humidity and temperature within the sauna.
6. Safety and Maintenance
Ensure your sauna is equipped with a thermometer and a hygrometer to monitor the temperature and humidity levels. Regular maintenance, including checking the heater, cleaning the interior, and inspecting for any signs of wear or damage, is essential to ensure your sauna remains a safe and enjoyable space.
FAQ
Yes, with detailed planning, the right tools, and a basic understanding of construction principles, it’s possible to build a simple outdoor sauna. However, for more complex designs or if you’re unsure, consider consulting with or hiring a professional.
The timeline can vary based on the complexity of the design, the materials used, and your experience level. On average, expect to spend several weekends or about 2-4 weeks to complete the project.
Generally, yes. Building your own sauna allows you to control costs more directly, choosing materials and designs that fit your budget. However, remember that quality should not be compromised, especially concerning the heater and insulation.
While you can use various types of wood, cedar, hemlock, and spruce are preferred for their resistance to moisture, decay, and their ability to handle high temperatures without warping.
Wrapping Up
Building a DIY outdoor sauna is a rewarding project that not only enhances your property’s value and aesthetic appeal but also offers a private retreat for relaxation and health benefits. With proper planning, the right materials, and a bit of elbow grease, you can create a backyard oasis that you and your loved ones can enjoy for years to come.


